Lighting The Lab
Using neopixels to light the lab. This page is a logbook for that ongoing project. Test.
What is the project?
Creating lights with colours using Neopixels. Neopixels are programmable pixels that work well with arduino, and possibly other microcontrollers, though this hasn't been tried by us yet. Really no other reason other than making stuff look cool.
Neopixels often come in long rolls and can be cut off at appropriate lengths. This is the neopixel product that so far has been used for all installations. It can be cut to lengths of down to one pixel, and during the project there have been lots of screwups, so there are a bunch of one-pixel scraps waiting to become small 'firefly lights' of their own.
Lamps
About 30 pixels is a good amount to power from 3 AA-batteries (U = 4.5 V). Have created five lamps with one battery pack each. This is the connection for the lamps:
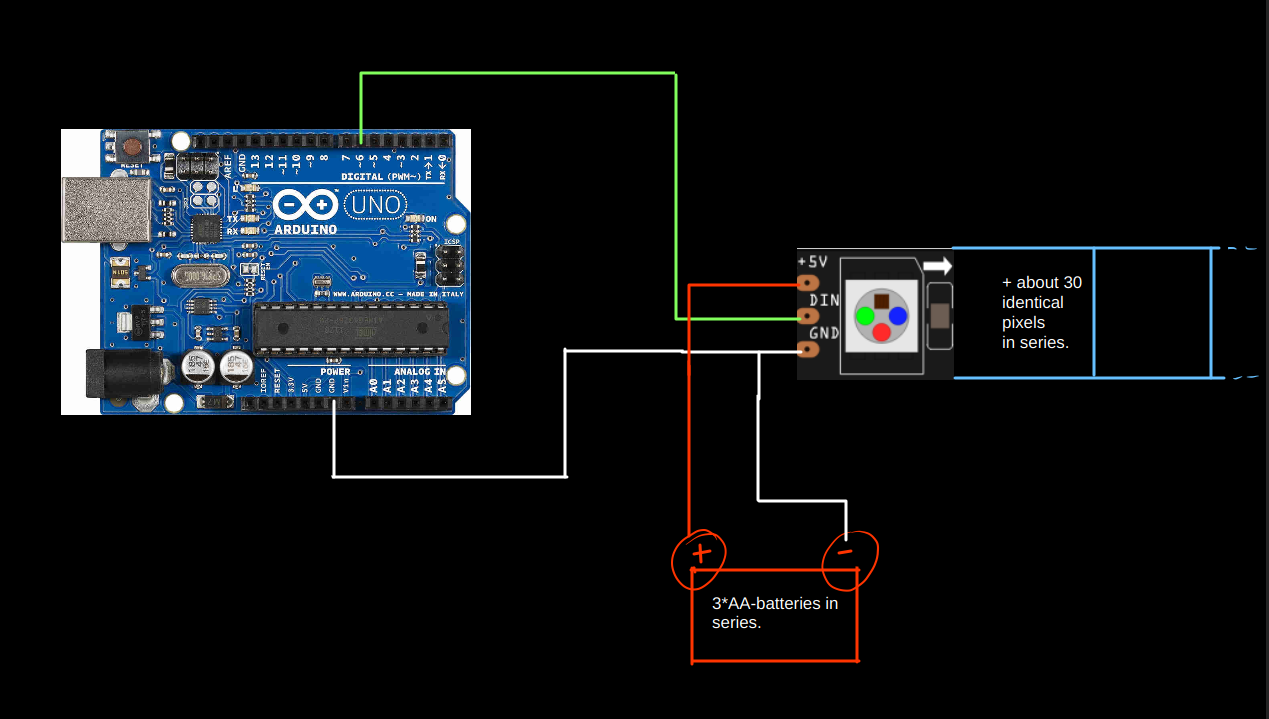
Some notes on this super simple connection that still had me stumped a bit:
- If you don't connect ground to Arduino it won't work - the arduino needs the ground as a reference point to be able to get voltage differences right when signals are sent to neopixels.
- The arrows indicate the direction of data flow. The indata from the Arduino must be connected to the arduino so that the arrow is in the direction indicated. Otherwise it won't work.
Finding a frosted or irregular glass surface makes the pixels less 'pin-pointy'. It would be cool to experiment with having them be behind water, maybe moving water.
Desk Lighting
Ok, this was way more work than anticipated, but fear not; someone has made all the bonehead mistakes for you!
There were two main obstacles here - fastening the pixel strands under the desk and powering them in a safe way.
Fastening the pixels under the desk
This I did not think would be a big deal. Pixel strands don't weigh much and tape fixes everything right? Wrong!!!! I tried duct-tape (ever since my cousin fastened a parachute on my oncles roof making us an awesome summer tent I have thought its allmighty) - did not work. Tried double-sided Gorilla tape - did not work.
The main problem was attaching the power sources (battery-packs with three AA-batteries) to the underside of the table. I tried this:
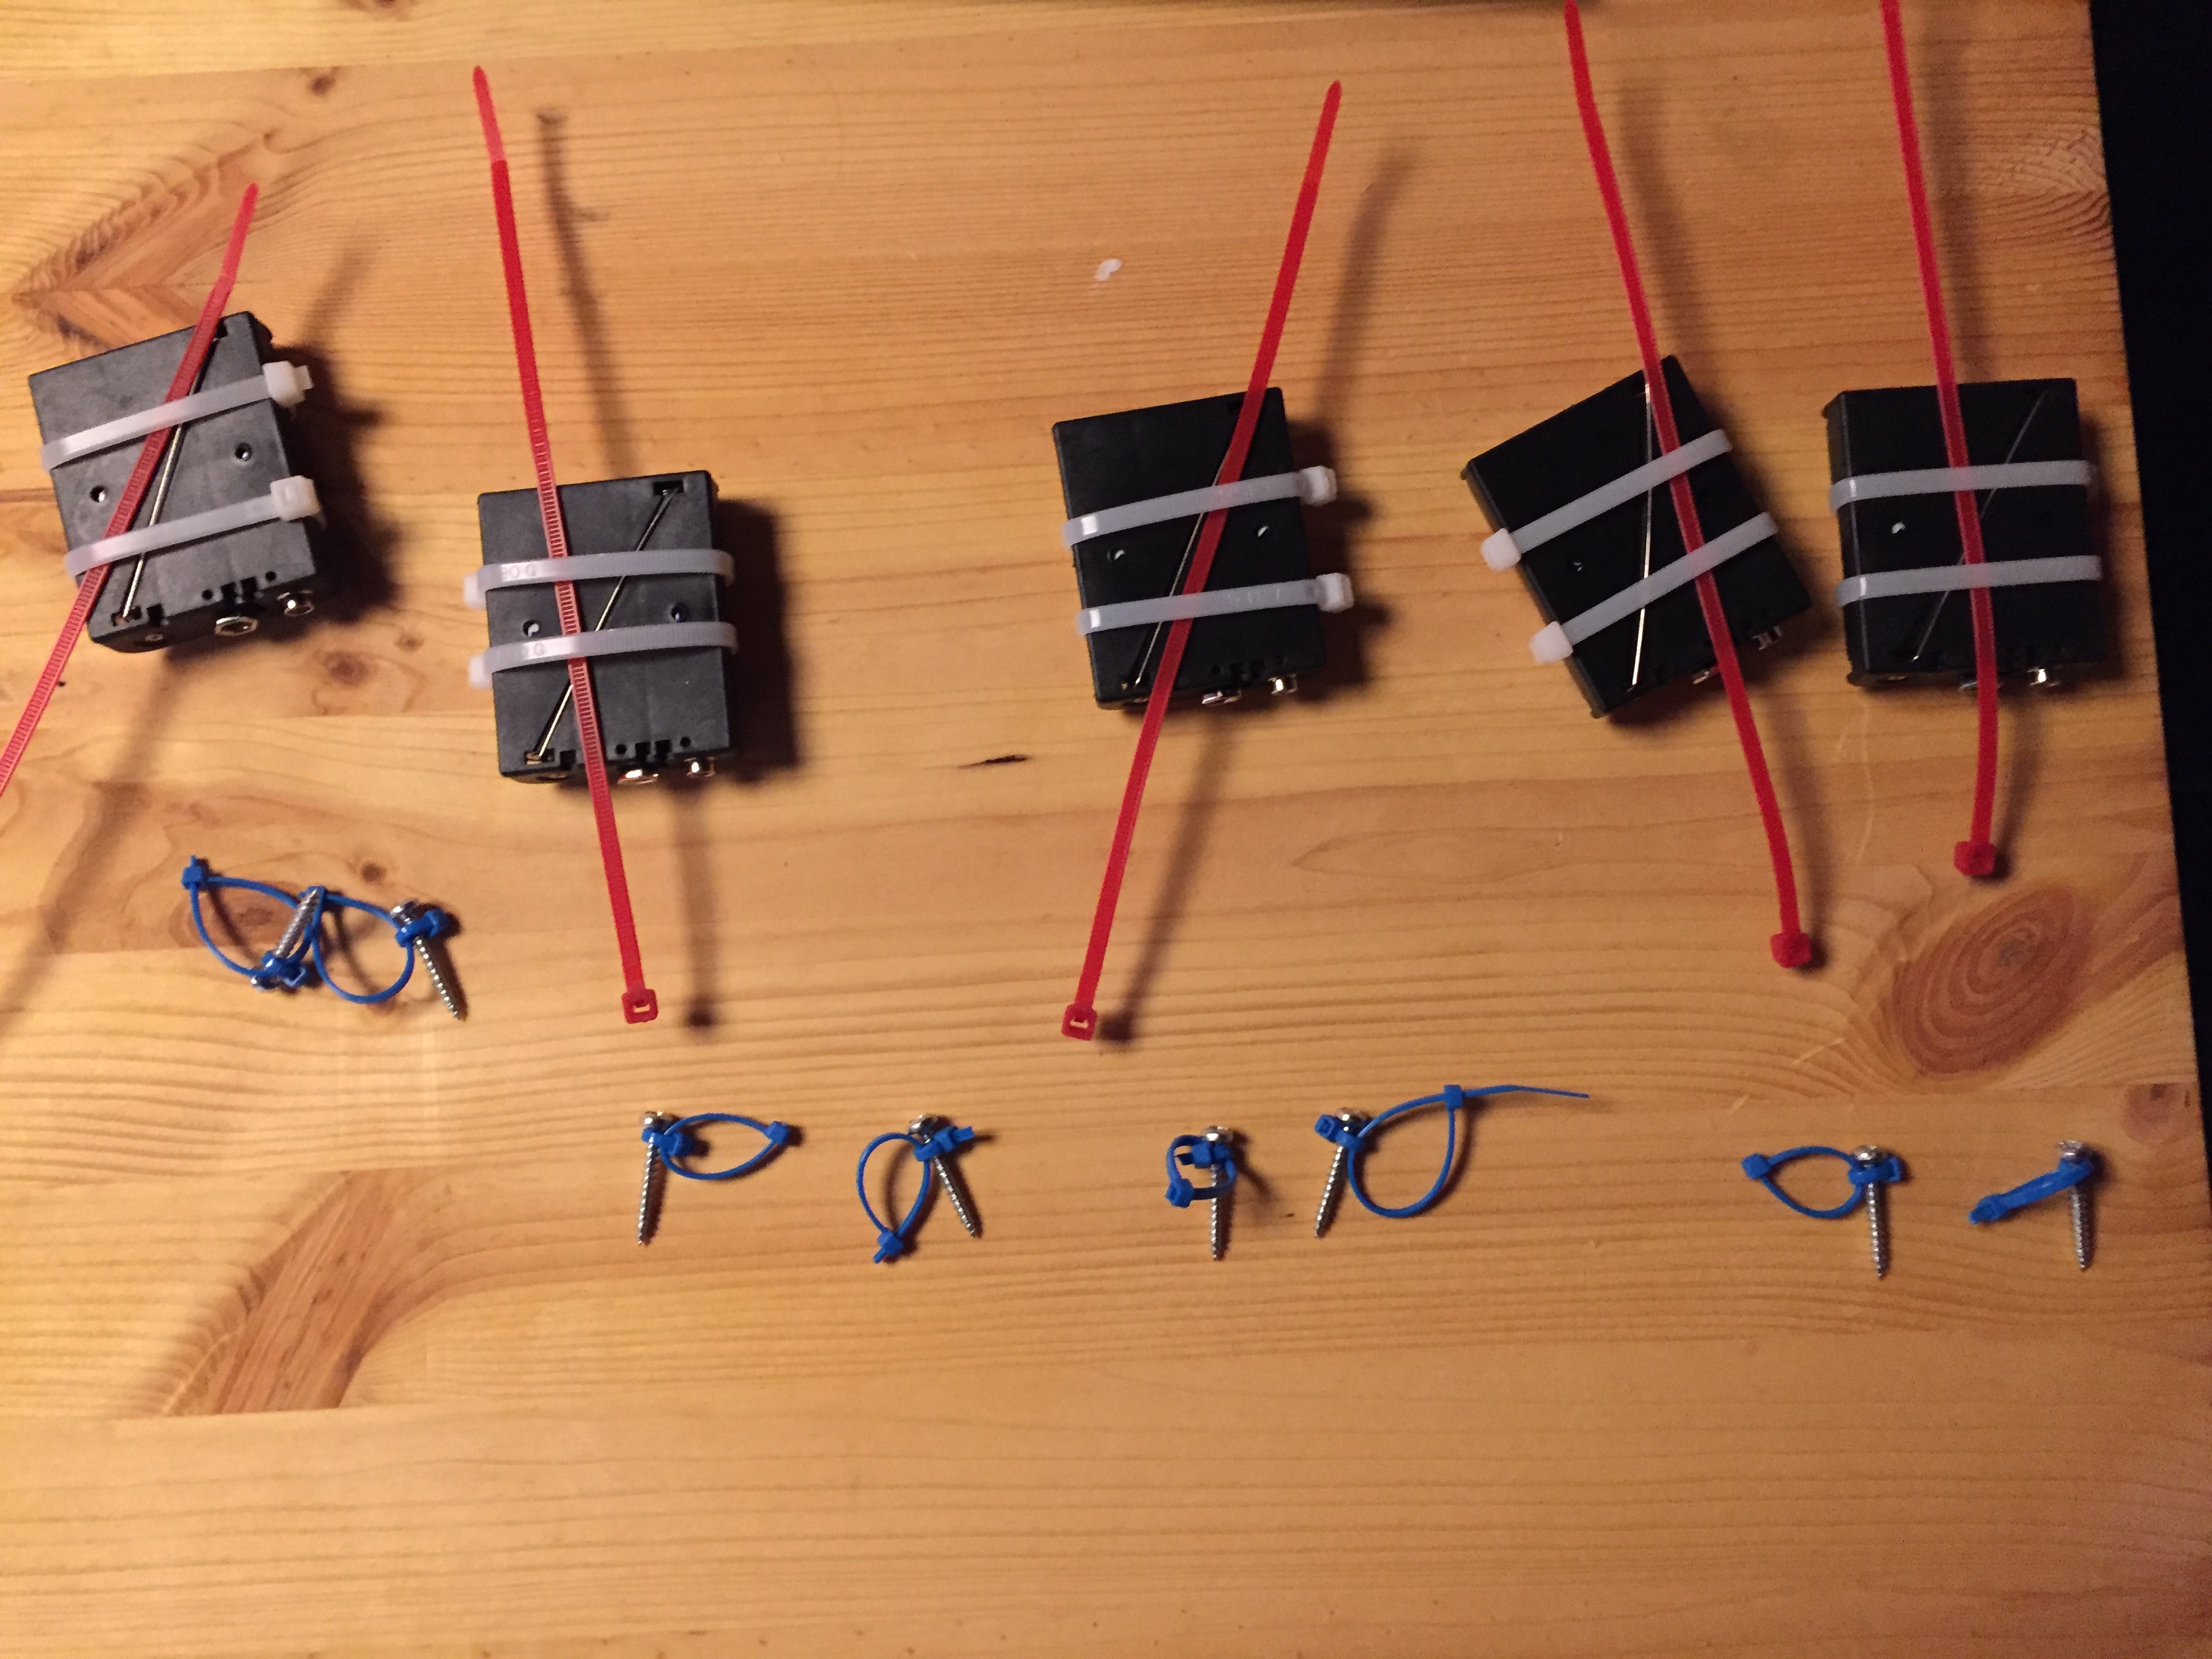
The screws are fastened to the underside of the table and have cable-connectors that the cable connectors around the batteries are fastened to. I fastened all these and ... - it did not work.
No light, no nothing.
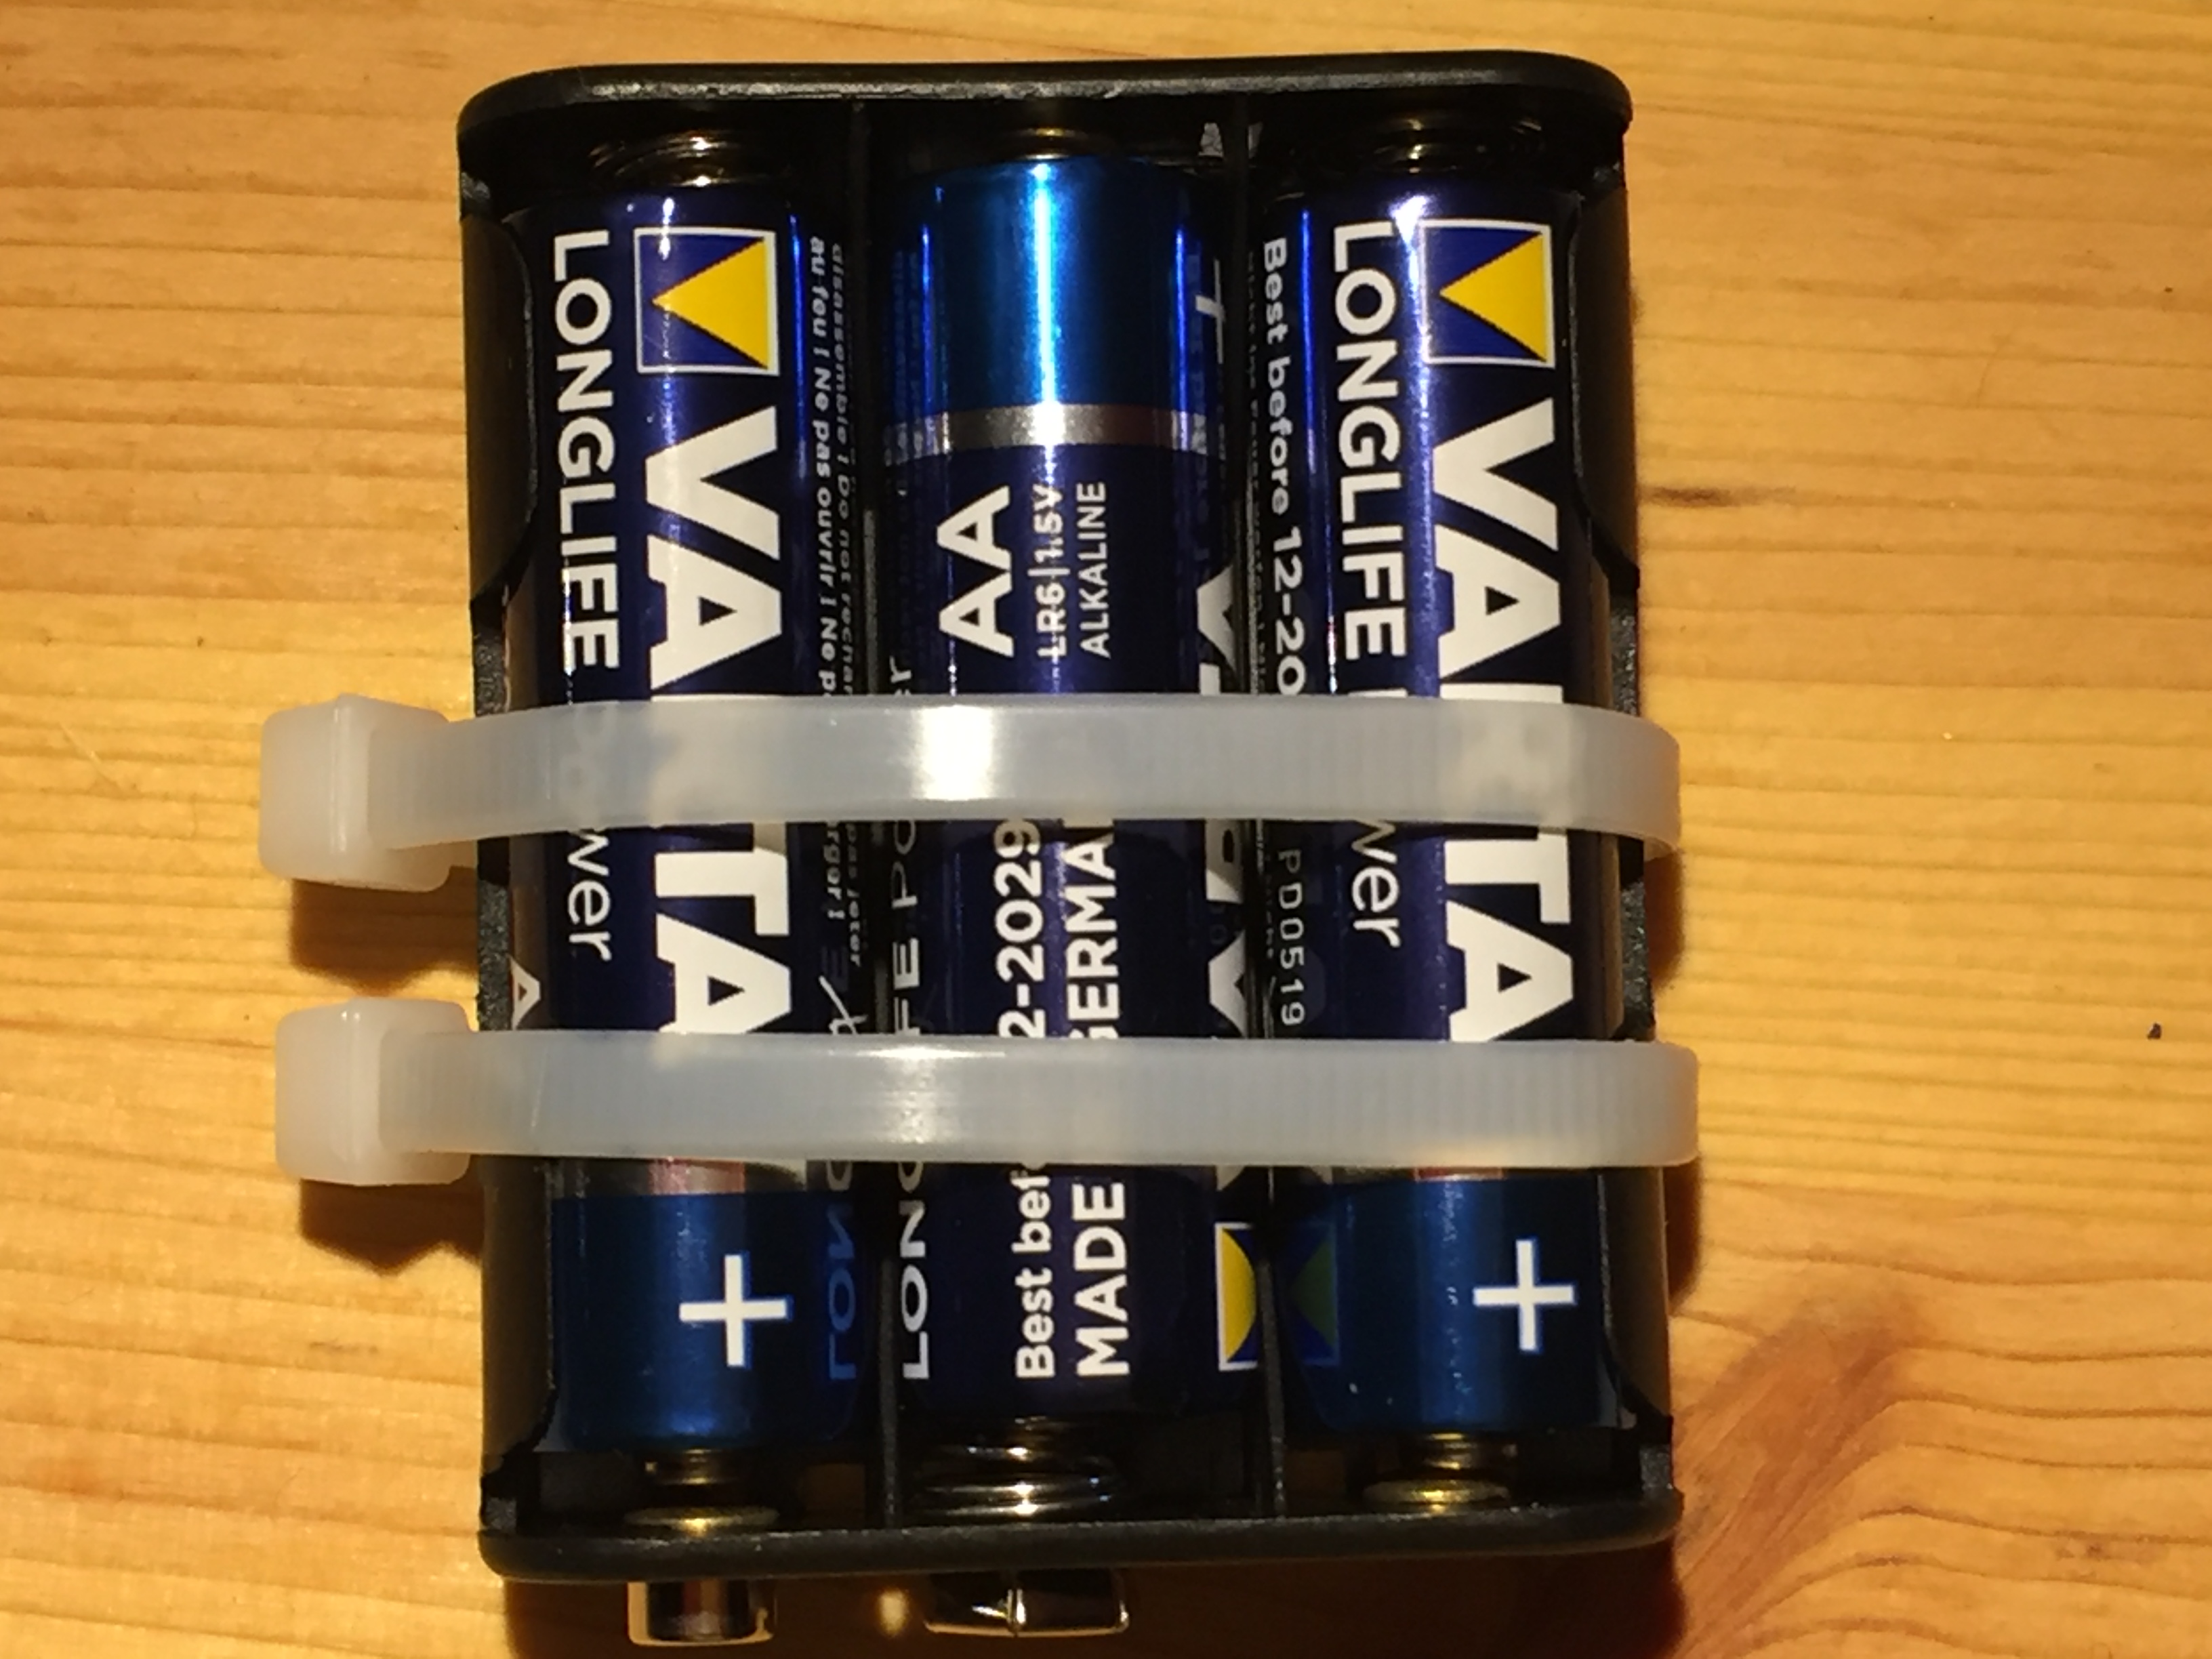
Very nonplussed I drank coffee and stared into the void of the internets. Checked the voltage across the poles of the batteryconnectors and realized that there was no voltage. The batteries were new, so total mystery... The solution was that the cable ties had held the batteries in place so that they weren't connecting to the metal at the end of the battery connectors! If you look carefully you can see that the top battery does not have connection to the metal on the left side:
 Finally realized that the batterypacks actually can just be screwed to the underside of the bench, they even have premade holes for this purpose... <- THIS IS SO FAR THE SEEMINGLY EASIEST WAY TO DO IT!
The pixel strips themselves were attached using very many cable tie mounts with cable ties attached. The cable mounts could not carry very much load on their own, so the spacing is probably around a decimeter between cable mounts.
Powering the pixels
There is a pdf that is gold and outlines how to power pixels - the takeaway for the lab was one 4.5 Volt batterypack for every 34ish pixels. I'm gonna upload it with credits as soon as I find it again... Found it! Kudos to Erik Katerborg! This is a great guide to powering Neopixels.
As can be seen in the link the power is distributed along the strip (that is why all the batterypacks had to go up) which lowers the dangers of shock if a short happens. There are other reasons for it too, but Erik explains it really good in that pdf.
As can be seen in the pdf the strip is divided into segments with their own battery pack connected by gnd and data but not by the line marked +5V on the Arduino. You can do this the stupid way like I did first and cut your strip in segments and then resolder the gnd and data (this makes the whole thing very brittle and you have to be super careful when fastening it to the bottom since only solder connects the strips and solder is not strong) or you can do this the smart way and just cut away the connection at the 5V-line. <- DO THIS UNLESS YOU FEEL YOU HAVE TOO FEW PROBLEMS IN YOUR LIFE.
CURRENT ISSUE - THE BATTERIES SEEM TO DRAIN DESPITE THE PIXELS BEING OFF WHEN THE BATTERY IS CONNECTED. The new batteryholders from Conrad have a nifty on/off switch but the ones I got first from Kjell don't and detaching/reattaching the battery connector could lead to something breaking because the first wire that was built is brittle (as mentioned above). Solution - in sensitive areas remove one battery in the pack instead of detaching the connector...
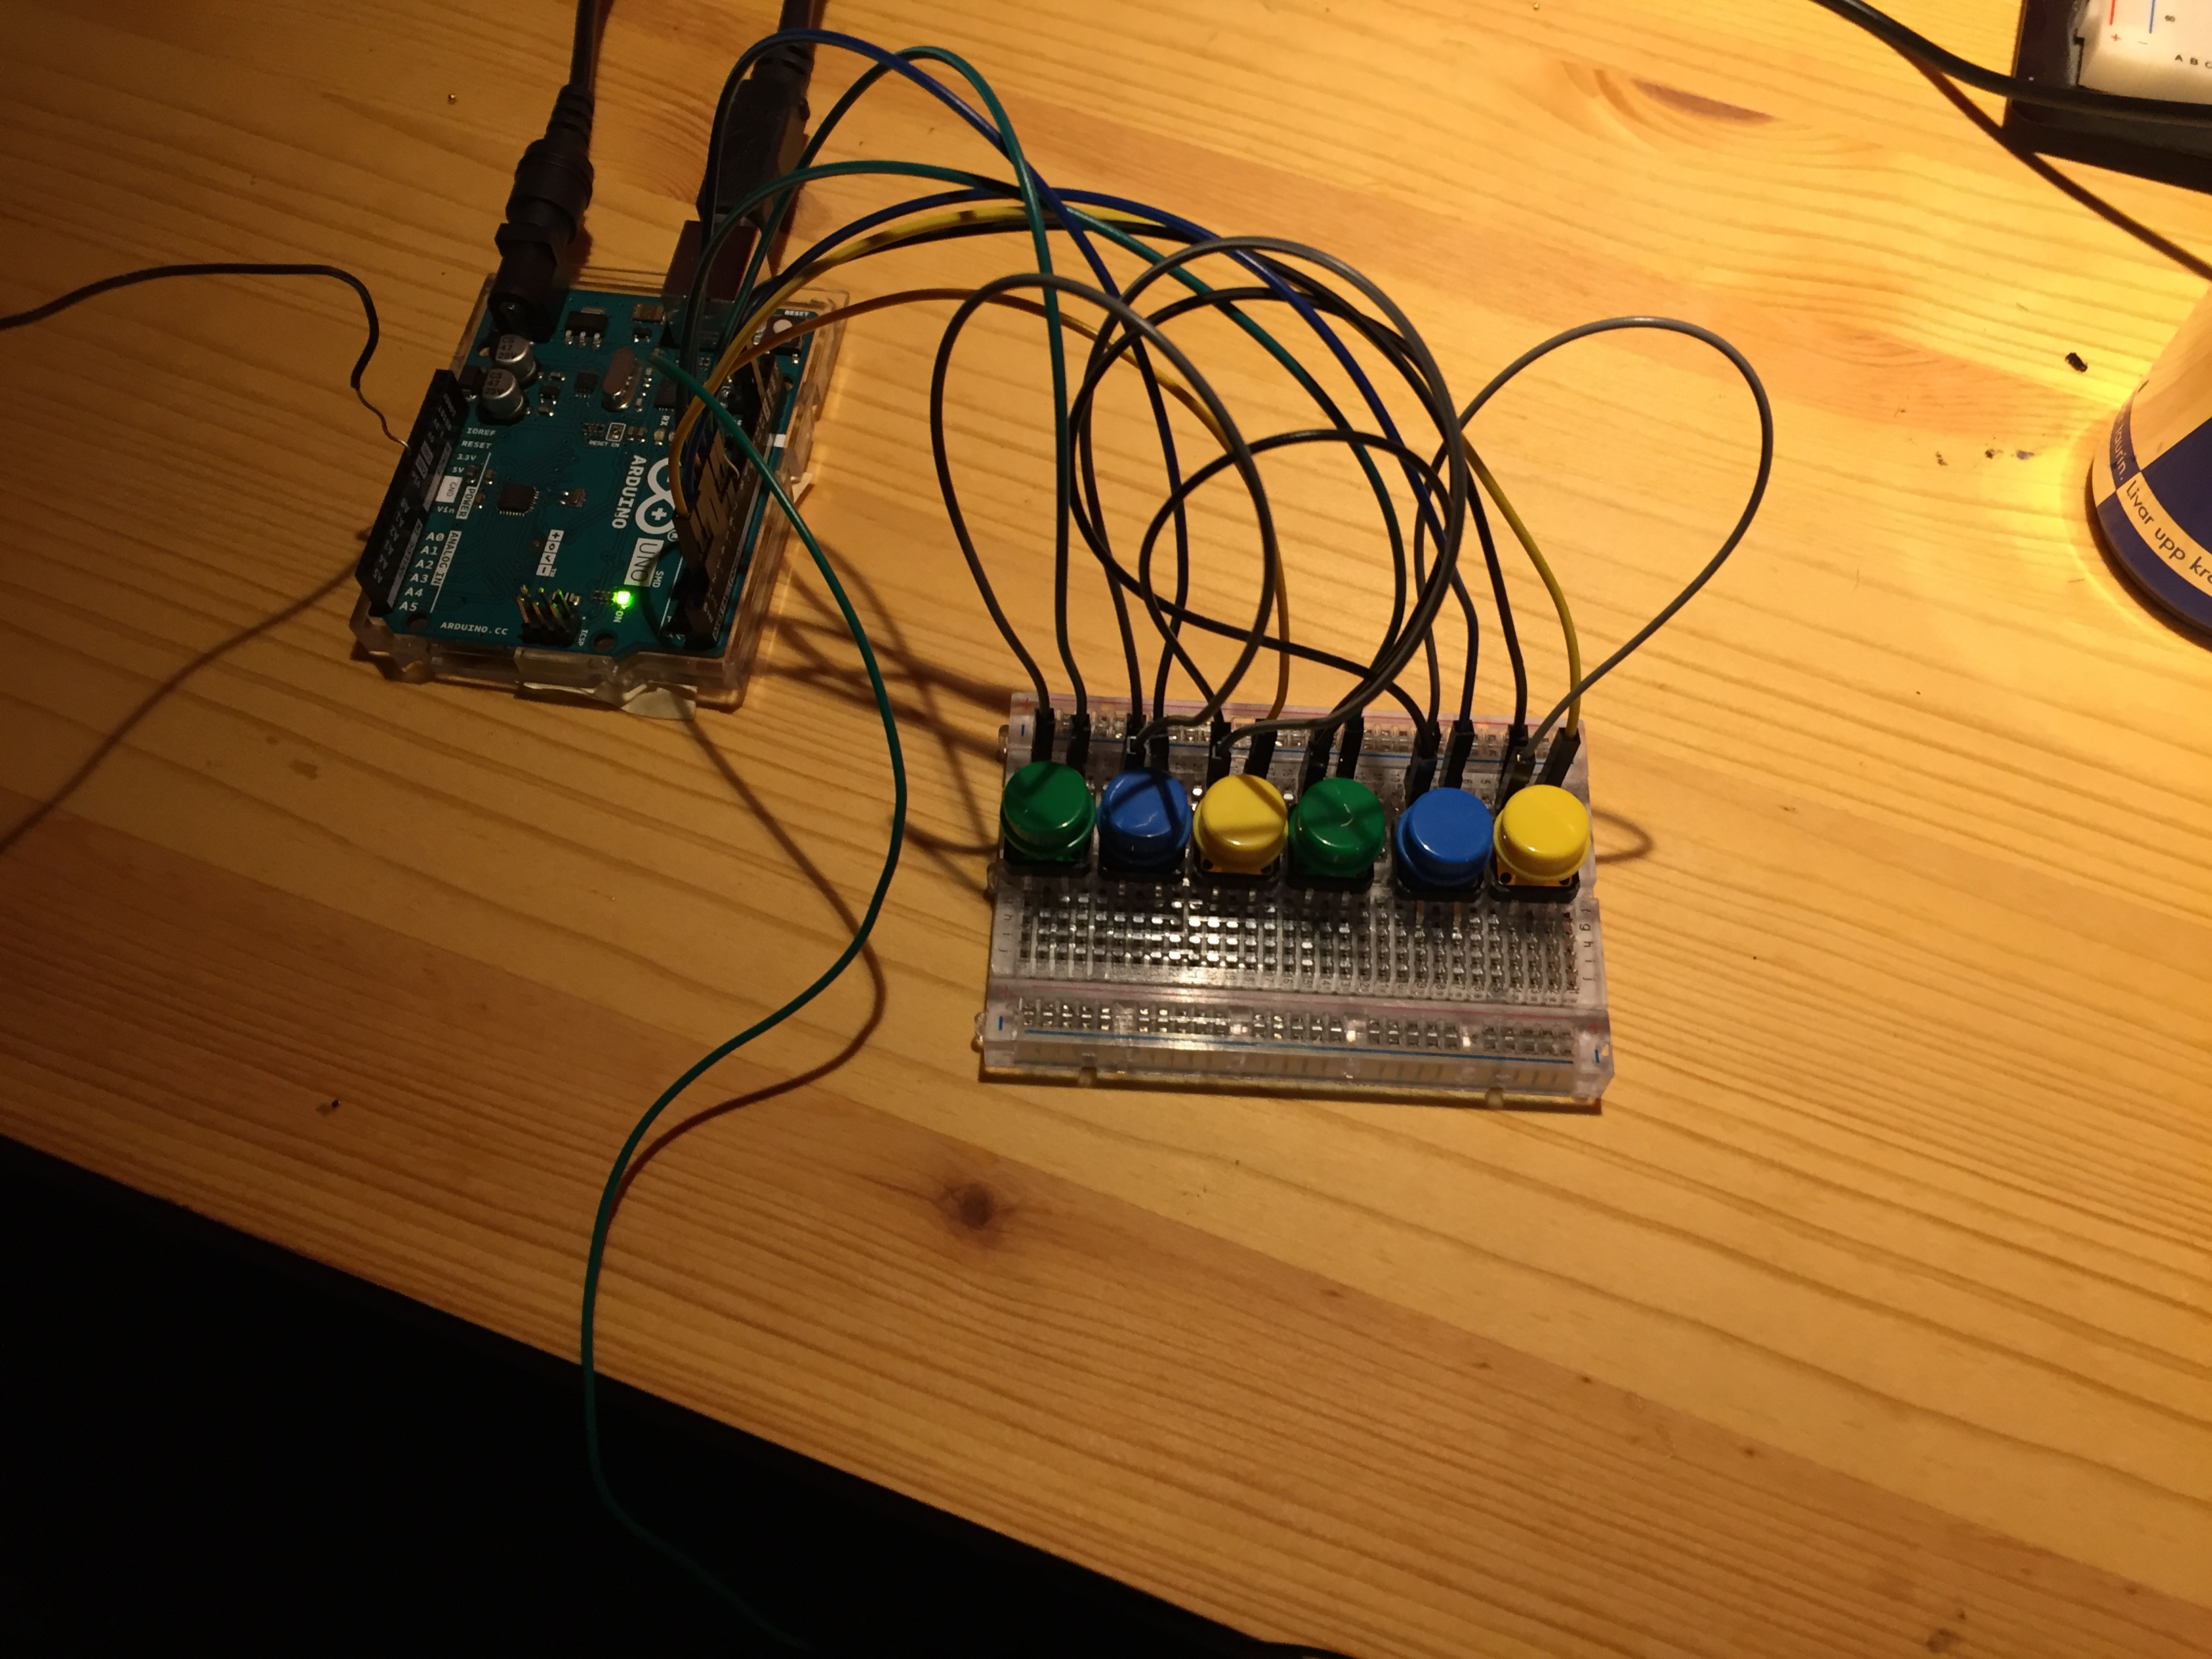
Button control
Each button is connected to its own input on the arduino.
Code
Have created a repo for the code on Github now. Uploaded the latest code that works. What it does right now is this in order from top to bottom:
- The top yellow button turns on the strip under/along the workbench, running a rainbow animation that cycles through the HSV cycle.
- The blue button switches to a slower rainbow program that has a longer delay.
- The green button switches to rainbow button that has a very short delay.
- The yellow button following the green one turns the LED:S in the strip off.
- The second blue button turns on the lamps, running a rainbow animation.
- The second green button turns off the lamps.
One kind of fun thing with writing code for neopixels is I can only run it when in the lab, so its like in the old days when you brought your program to the computer, tested it and then went home to rebuild... Its kind of nice, slows you down which stops you from writing too fast and sloppy.
Update - to be sorted into text later. Since the feeling of 'painting animation' was better with Adriano Tigers Neopixel Simulator, test is being done to add button functionality to code generated by his simulator. Since I saw in an Arduino post that he consciously wrote the code so it would be easy to interrupt. This works and local programs with 'painted animation' for the lamps works. Will update Github-project later. : )
Short update: The code being used for lamps right now is the code in the developmentBranch on Github.