ESP32
An introduction to the ESP32 microcontroller.
Introduction
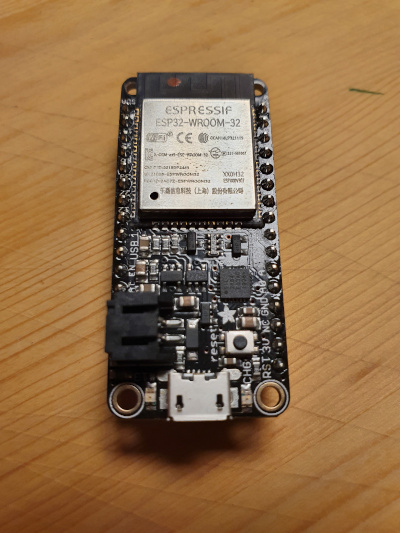
The ESP32 is a very powerful microcontroller that is packed with features. You can buy the ESP32 chip standalone, but the easiest way to get started is to get your hands on one of the developer boards. In our case this is the Adafruit HUZZAH32 Feather:
Some quick run down features:
- 240 MHz dual core processor
- 520 kB SRAM
- Wi-Fi
- Bluetooth
- 4 MB flash
- On-board PCB antenna
- Hall sensor
- 12 x ADC input channels
- 3 x UART
- 3 x SPI
- 2 x I2C
- 2 x I2S Audio
- Pulse Width Modulation (PWM) on all GPIO pins
In order to actually use the board, we need to flash it with some kind of firmware and there are many to pick from. You can use the Arduino IDE or the latest hotness with Rust. We will start with MicroPython.
Install Micropython (Linux)
Install esptool.py:
$ pip3 install esptool
$ pip3 install adafruit-ampy
Check usb device:
$ dmesg -w
...
Plug in the board, dmesg should then print out which tty device got connected:
$ dmesg -w
[1595353.186782] usb 1-6: new full-speed USB device number 8 using xhci_hcd
[1595353.337407] usb 1-6: New USB device found, idVendor=10c4, idProduct=ea60, bcdDevice= 1.00
[1595353.337415] usb 1-6: New USB device strings: Mfr=1, Product=2, SerialNumber=3
[1595353.337419] usb 1-6: Product: CP2104 USB to UART Bridge Controller
[1595353.337423] usb 1-6: Manufacturer: Silicon Labs
[1595353.337427] usb 1-6: SerialNumber: 01D41134
[1595353.339707] cp210x 1-6:1.0: cp210x converter detected
[1595353.342290] usb 1-6: cp210x converter now attached to ttyUSB0
In this case the device is /dev/ttyUSB0
Before we flash the MicroPython firmware we need to erase the flash:
$ esptool.py --chip esp32 --baud 115200 --port /dev/ttyUSB0 erase_flash
esptool.py v3.2
Serial port /dev/ttyUSB0
Connecting.....
Chip is ESP32-D0WDQ6 (revision 1)
Features: WiFi, BT, Dual Core, 240MHz, VRef calibration in efuse, Coding Scheme None
Crystal is 40MHz
MAC: 24:62:ab:b0:32:88
Uploading stub...
Running stub...
Stub running...
Erasing flash (this may take a while)...
Chip erase completed successfully in 8.6s
Hard resetting via RTS pin...
Download MicroPython firmware for the ESP32 from https://micropython.org/download/esp32/ and make sure to pick the most recent stable ESP-IDF v3.x file, e.g. esp32-idf3-20210202-v1.14.bin.
Flash the firmware:
$ esptool.py --chip esp32 --baud 115200 --port /dev/ttyUSB0 write_flash -z 0x1000 esp32-idf3-20210202-v1.14.bin
esptool.py v3.2
Serial port /dev/ttyUSB0
Connecting....
Chip is ESP32-D0WDQ6 (revision 1)
Features: WiFi, BT, Dual Core, 240MHz, VRef calibration in efuse, Coding Scheme None
Crystal is 40MHz
MAC: 24:62:ab:b0:32:88
Uploading stub...
Running stub...
Stub running...
Configuring flash size...
Flash will be erased from 0x00001000 to 0x00161fff...
Compressed 1445632 bytes to 925476...
Writing at 0x0013d20f... (89 %)
..
Wrote 1445632 bytes (925476 compressed) at 0x00001000 in 81.9 seconds (effective 141.2 kbit/s)...
Hash of data verified.

Leaving...
Hard resetting via RTS pin...
Testing MicroPython
Restart the device by reconnecting the usb cable.
Use screen to start the Python REPL
$ screen /dev/ttyUSB0 115200
After that command, press the enter key once more and you should see the Python prompt:
>>>
>>> help()
Welcome to MicroPython on the ESP32!

For generic online docs please visit http://docs.micropython.org/

For access to the hardware use the 'machine' module:

import machine
pin12 = machine.Pin(12, machine.Pin.OUT)
pin12.value(1)
pin13 = machine.Pin(13, machine.Pin.IN, machine.Pin.PULL_UP)
print(pin13.value())
i2c = machine.I2C(scl=machine.Pin(21), sda=machine.Pin(22))
i2c.scan()
i2c.writeto(addr, b'1234')
i2c.readfrom(addr, 4)

Basic WiFi configuration:

import network
sta_if = network.WLAN(network.STA_IF); sta_if.active(True)
sta_if.scan()                             # Scan for available access points
sta_if.connect("<AP_name>", "<password>") # Connect to an AP
sta_if.isconnected()                      # Check for successful connection

Control commands:
  CTRL-A        -- on a blank line, enter raw REPL mode
  CTRL-B        -- on a blank line, enter normal REPL mode
  CTRL-C        -- interrupt a running program
  CTRL-D        -- on a blank line, do a soft reset of the board
  CTRL-E        -- on a blank line, enter paste mode

For further help on a specific object, type help(obj)
For a list of available modules, type help('modules')
Run some code
Upload the blink.py example and run it by connecting with screen and importing the file. Abort execution with Ctrl+C. You should see the red LED next to the USB port blinking.
$ ampy -p /dev/ttyUSB0 put blink.py
$ screen /dev/ttyUSB0 115200
>>> import blink
Note that if you abort the program with Ctrl-C, the LED will keep its state. So if you abort the program while the LED is on, it will stay on. Trying to import blink again doesn't work, so you need to do a soft reboot by pressing Ctrl-D.
Command Summary
Ctrl-A k, to disconnect from device and get out of screen mode (You can also doCtrl-A d, if you want to detach from thescreensession, which you then can reconnect to byscreen -rbut normally you want to quit thescreensession to do other commands for putting files etc, since thescreensession will lock the usb)Ctrl-D, to soft reboot the device- List files
ampy -p /dev/ttyUSB0 ls - Upload a file
ampy -p /dev/ttyUSB0 put blink.py - Get a file
ampy -p /dev/ttyUSB0 get blink.py